Using USB3 Vision Cameras with MVTec HALCON in OS X
Download PDF - Using USB3-Vision-MVTec-HALCON-OSX
Preparing for Use
Before you use your Point Grey camera, we recommend that you are aware of the following resources available from the Downloads page:
Getting Started Manual for the camera—provides information on installing components and software needed to run the camera.
Technical Reference for the camera—provides information on the camera’s specifications, features and operations, as well as imaging and acquisition controls.
Firmware updates—ensure you are using the most up-to-date firmware for the camera to take advantage of improvements and fixes.
Technical Application Notes—For additional guidance on USB 3.1, see:
- USB 3.1 Frequently Asked Questions
- Recommended USB 3.1 System Components
- Extending the Working Distance of Point Grey USB 3.1 Cameras
- Top 5 Best Practices When Building a USB3 Vision System
Tech Insights—are Point Grey's monthly email updates containing information on new knowledge base articles, new firmware and software releases, and Product Change Notices (PCN). Subscribe here.
Recommended System Configuration
Point Grey has tested and recommends the following configuration.
| Component | Description |
| MacBook Pro 15" | Model MacBook Pro11,3 |
| CPU | Intel Core i7 2.6 GHz |
| RAM | 8 GB of 1600 MHz DDR3 SDRAM |
| Operating System | OS X 10.10.2 Yosemite |
| Software | HALCON 12 with USB3 Vision Rev 6.2 interface |
| Camera | Blackfly BFLY-U3-13S2C firmware 1.6.3.0 |
System Setup and Configuration
- From the HALCON website, download HALCON 12 for OS X and the latest USB3 Vision interface. Note: you need a login account to access HALCON 12 download.
- Run HALCON installer.


HALCON 12 comes with USB3 Vision interface revision 6.1. Point Grey recommends updating the USB3 Vision interface to the latest version. For this document, Point Grey has tested revision 6.2 USB3 Vision interface.
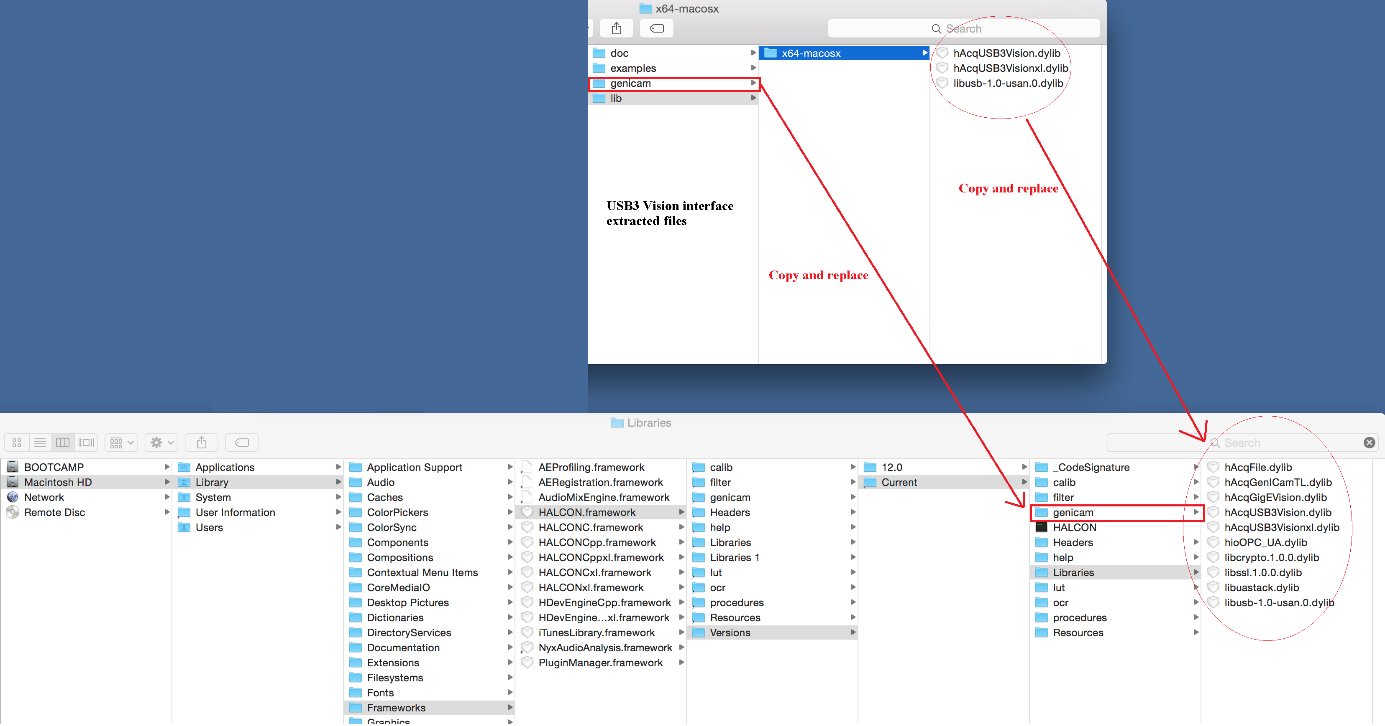
- To update your USB3 Vision interface for HALCON 12, extract the USB3 Vision interface update downloaded in step 1 above. Then copy and replace the corresponding files to the HALCON framework path.
- Connect the USB3 camera to the computer and ensure that the camera is using USB3 Vision firmware.
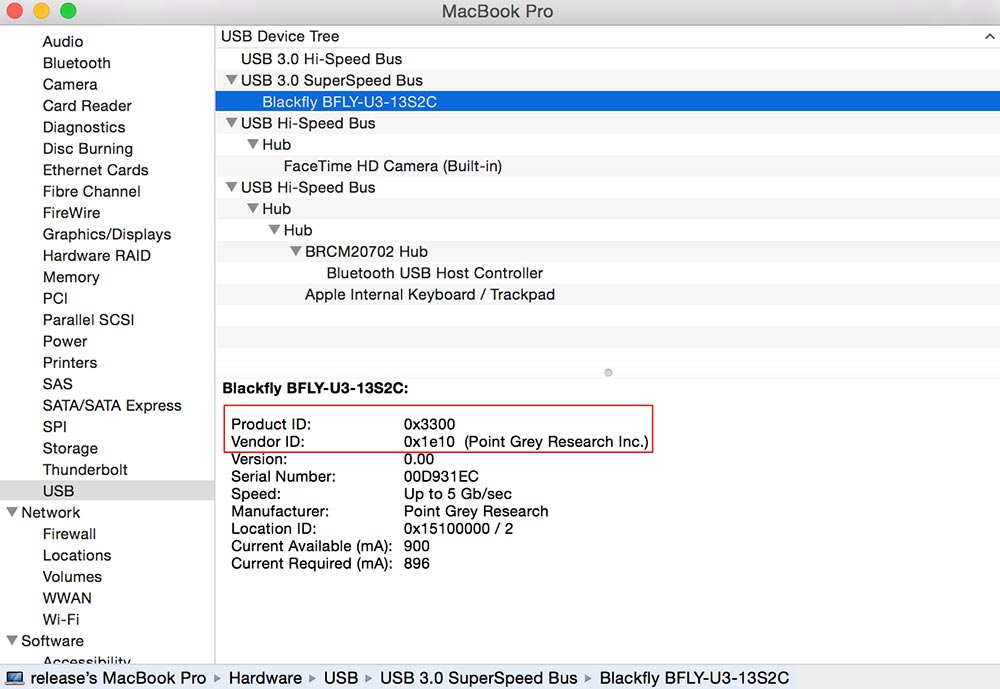
- To check if your camera is using USB3 Vision firmware:
- Go to OS X system information → Hardware → USB.
- Select your USB3 camera.
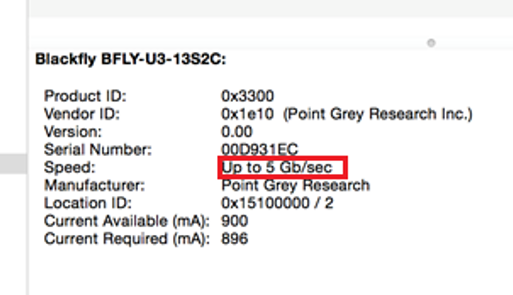
- Check the camera’s product ID and Vendor ID. The correct numbers for USB3 are:
- Vendor ID — 0x1e10
- Product ID — 0x3300

If the camera is not using USB3 Vision firmware, see Troubleshooting for instructions on how to update to the firmware.
| |
Firmware cannot be updated using OS X. Use Windows to update to USB3 Vision firmware, then use the camera on the original (OS X) system. |
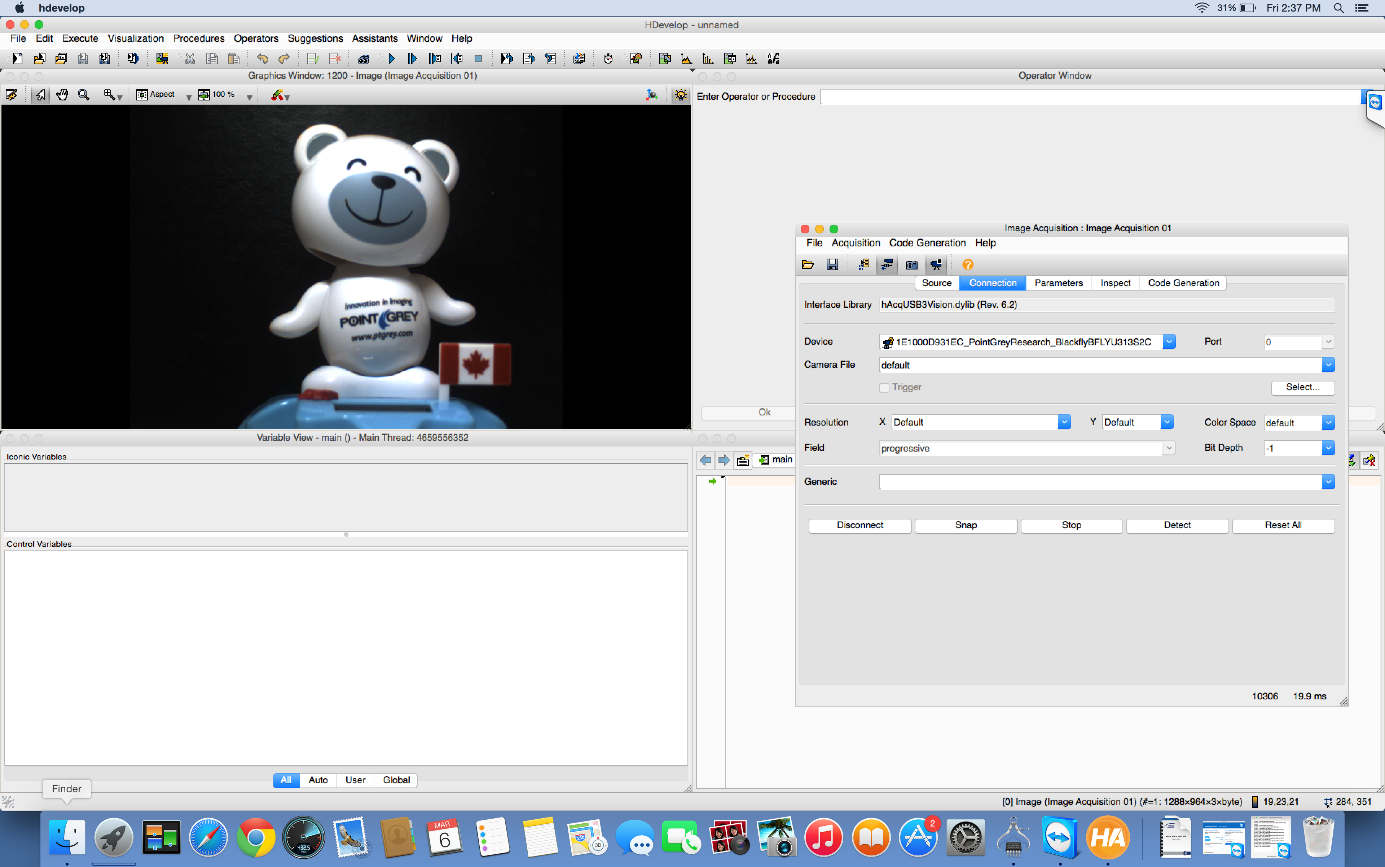
Configuring a USB3 Camera
- Open HALCON and start HDevelop.
- Click Auto-detect Interfaces. Note: USB3 Vision appears automatically in the Auto detect menu.

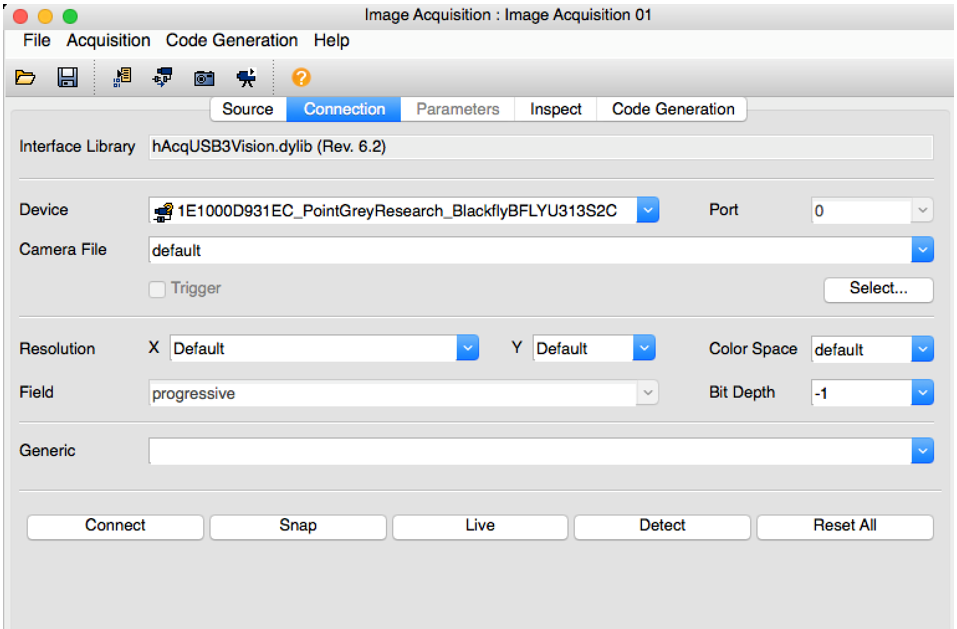
- In the Connection tab, press Connect to connect the host PC to the camera.
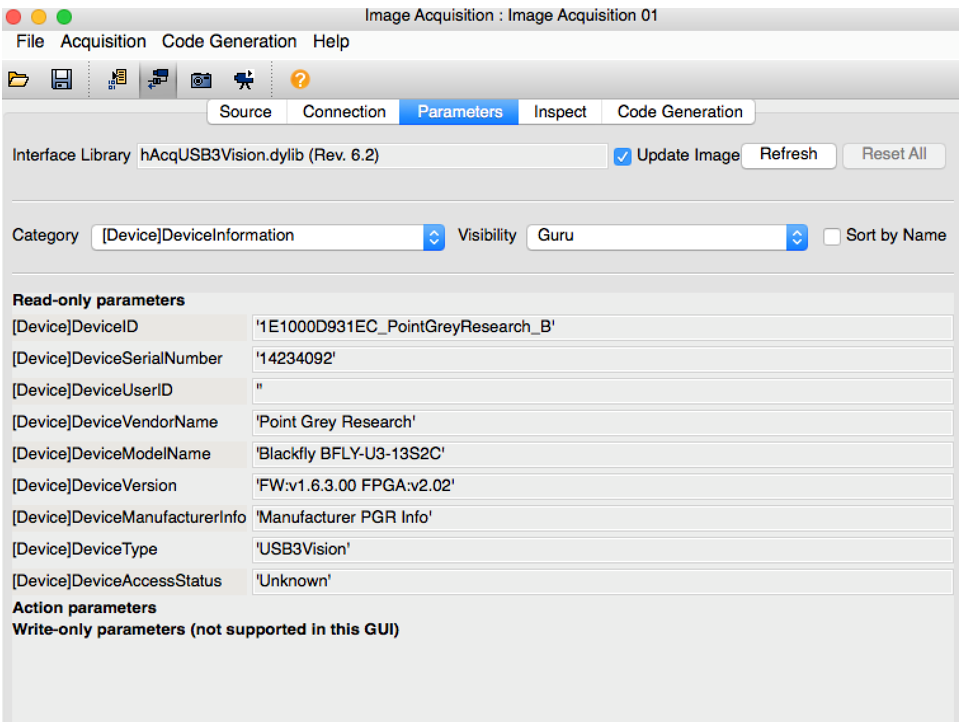
- Click the Parameters tab and choose the category of settings that you want to change.
Streaming a USB3 Camera
Go to the Connection tab and press Live to continuously capture images.
Troubleshooting
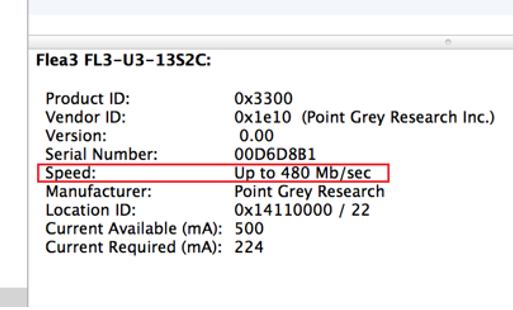
How do I verify that my camera is running at USB3 speed?
To verify that your camera is running at USB3 speed:
- Go to OS X → System information → Hardware → USB.
- Select your camera and note the speed indicated.
If your camera is running at USB2 speed, the speed is Up to 480 Mb/sec.
If your camera is running at USB3 speed, the speed is Up to 5 Gb/s.
If your camera is running at USB2 speed, verify that you are using the recommended USB3 cable and host controller card. See this list of recommended USB3 system components for additional details and suggestions.
How do I update my camera's firmware to USB3Vision firmware?
| |
Camera firmware that supports USB3 Vision has a “USB3 Vision Firmware” label on the download link. |
You can update your USB3 camera firmware in Windows or Linux.
To update:
- Download the latest FlyCapture2 SDK from the Point Grey Downloads page.
- Download the latest USB3 Vision firmware.
- Connect the camera to the PC and ensure the camera has powered up.
- Open the UpdatorGUI utility that was installed with FlyCapture2 SDK.
Start menu → All Programs → Point Grey FlyCapture2 SDK → Utilities → UpdatorGUI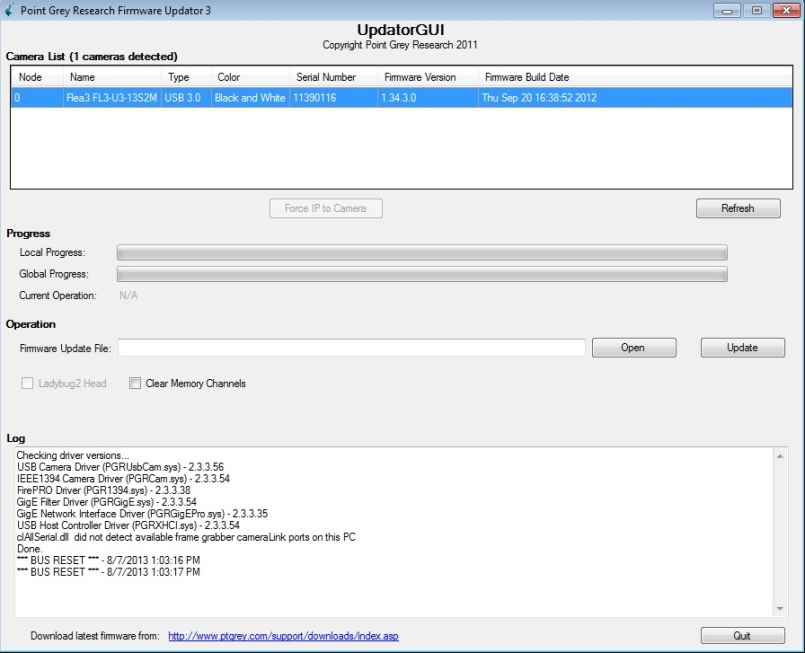
- Select the camera from the Camera List.
- Click Open to select the firmware file.
- Click Update to begin the update process. Do NOT disconnect the camera until the update is complete.
Related Articles
-
 Others
FLIR.de
Read the Story -
Others
FLIRArabia.com
Read the Story -
Others
FLIR.se
Read the Story