Getting Started with Adaptive Vision
Download PDF - GSM-Adaptive-Vision
Preparing for Use
Before you use your camera, we recommend that you are aware of the following resources available from our Downloads page:
- Getting Started Manual for the camera—provides information on installing components and software needed to run the camera.
- Technical Reference for the camera—provides information on the camera’s specifications, features and operations, as well as imaging and acquisition controls.
- Firmware updates—ensure you are using to most up-to-date firmware for the camera to take advantage of improvements and fixes.
Installation and Configuration
Step 1-Install Adaptive Vision
Adaptive Vision Studio is available for download from the Adaptive Vision website. Adaptive Vision supports all FLIR machine vision cameras through its PointGrey filter and supports GigE Vision cameras through a dedicated set of filters for GigE Vision cameras.
Step 2—Install FlyCapture2 for FireWire, USB2 and USB3 Cameras
Download and install FlyCapture2 from our downloads page. FireWire, USB2 and USB3 camera users must use FlyCapture2 in order to access Adaptive Vision’s PointGrey filters.
 |
We have tested Adaptive Vision Studio 4.1 with FlyCapture 2.7.3.11. |
Step 3-Connect the Camera to the PC
Connect the camera to the PC. For information, see the camera’s Getting Started Manual.
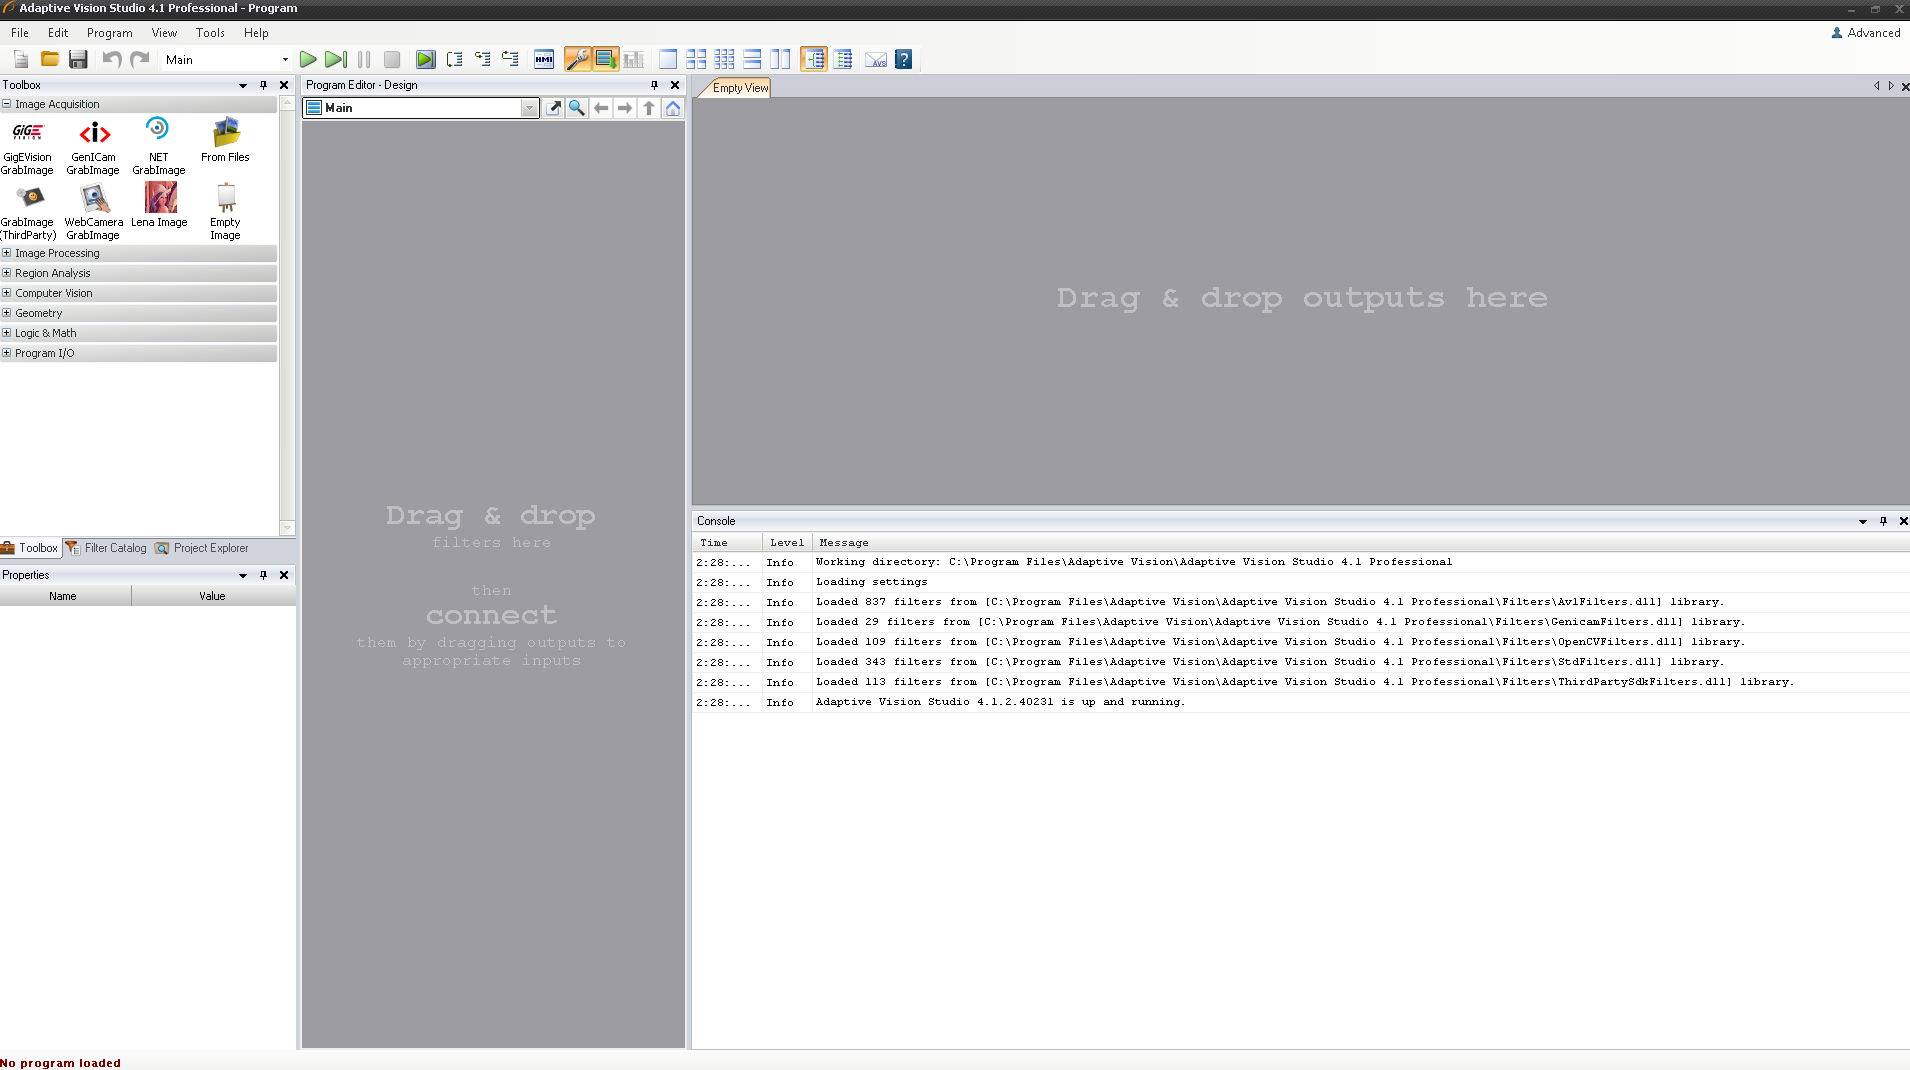
Step 4-Start Adaptive Vision Studio
Launch Adaptive Vision from the Windows Start Menu.
Start Menu→ All programs → Adaptive Vision → Adaptive Vision Studio 4.1 Professional.
Step 5-Enumerate the Camera
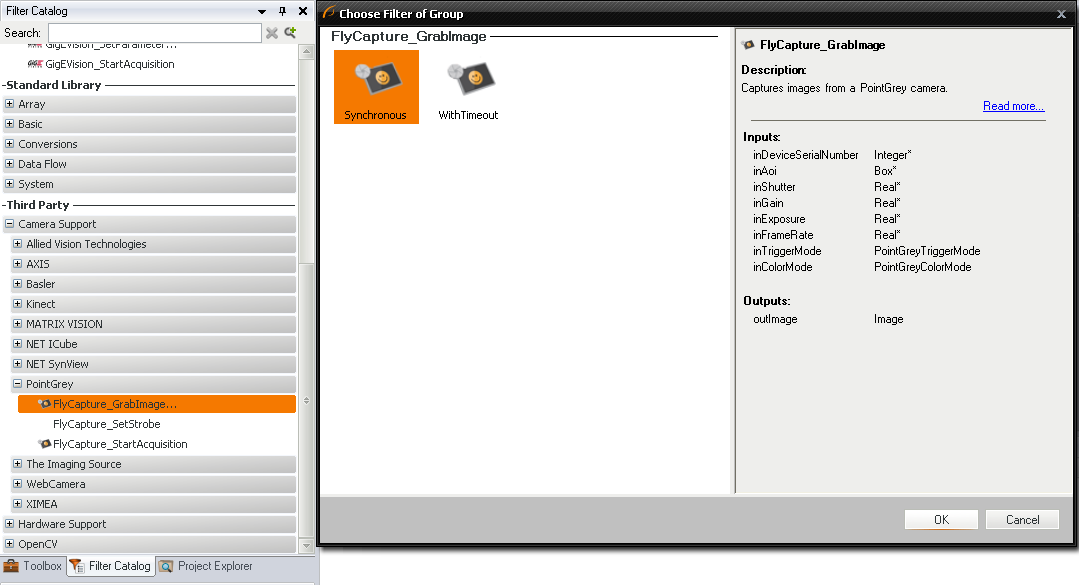
To enumerate a FireWire, USB2 and USB3 Camera
In Adaptive Vision’s Filter Catalog, double-click on FlyCapture_GrabImage and click OK.
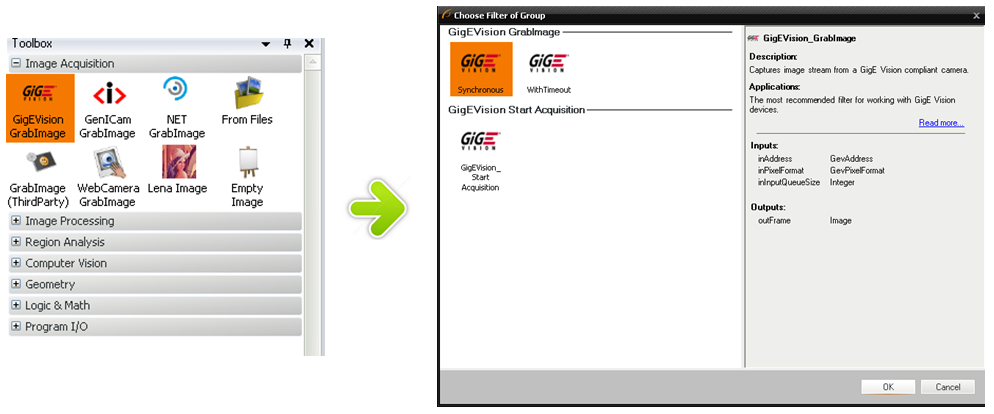
To enumerate a GigE Vision Camera
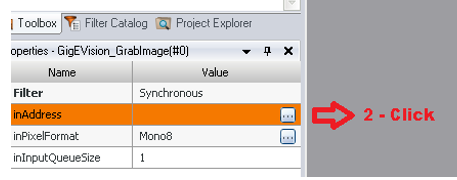
- Double-click on GigE Vision_GrabImage and select Synchronous, then click OK.
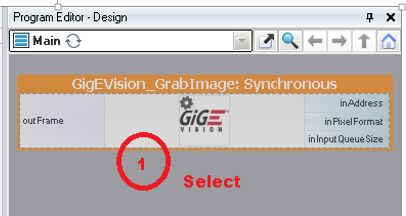
- Select GigE Vision_GrabImage in Program Editor. On the properties page, click on the three dots next to inAddress More button (three dots) to open the GigE Vision Device Manager window.
- Click on the camera you want to use and click the Select button. If the connected camera is unreachable, as shown by the yellow warning triangle beside the second camera on the list shown, see the Troubleshooting section.

Step 6-Configure Camera Settings (Optional)
To configure FireWire, USB2 and USB3 camera settings
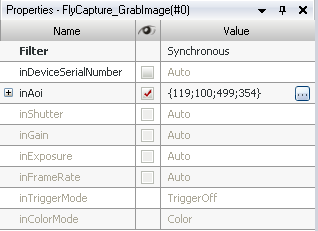
To change camera settings using the PointGrey filter, navigate to the property page and change the property. Here is an example of changing the region/area of interest.
 |
The supported settings are listed in Adaptive Vision’s PointGrey filter page. For example, FlyCapture_GrabImage supports inputs such as FrameRate, Shutter, and Gain. Some settings cannot be accessed via the PointGrey filter. In those cases, configure the camera’s default start-up setting using FlyCapture2 SDK. For more info, please see Using memory channels to configure default start-up settings. |
To configure GigE Vision camera settings
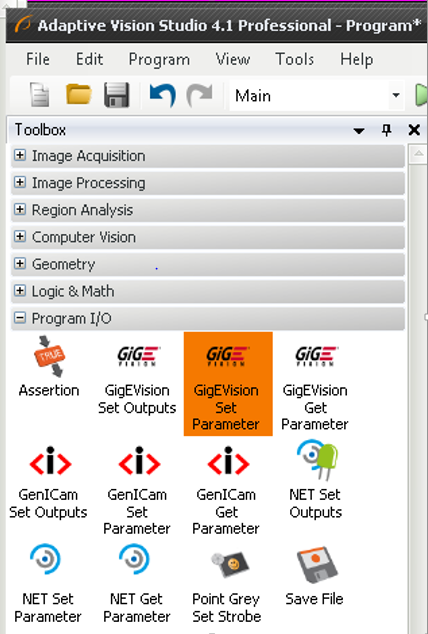
- In the Toolbox, from the Program I/O tab, select GigE Vision_SetParameter.
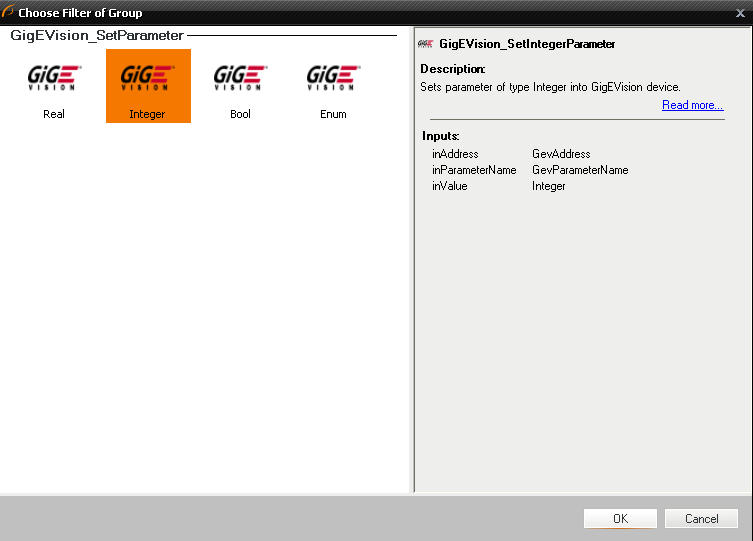
- In the new window, select a filter group. If you know the type of your parameter value, select the type and click OK. If you don’t know the type, select any type and click OK. You can determine the correct type and change it later.
- In the properties window, click the inAddress More button (three dots) and select the camera.
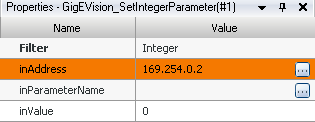
- In the properties window, click the inParameterName More button (three dots) and select the camera.
- In the GenICam Parameter Selection window, browse to the camera setting you wish to change and click Select. You can see the feature type here.
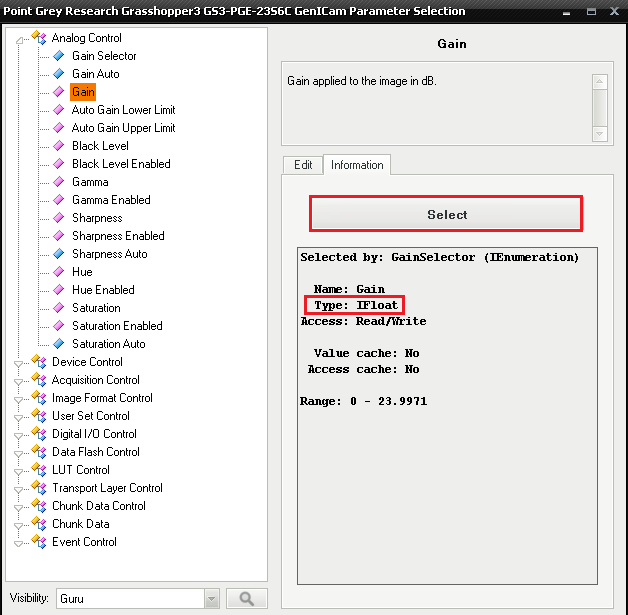
- In the properties page, ensure the filter type matches the type of camera property you want to change. Repeat these same steps to configure another camera setting.
Step 7—Start Acquistion
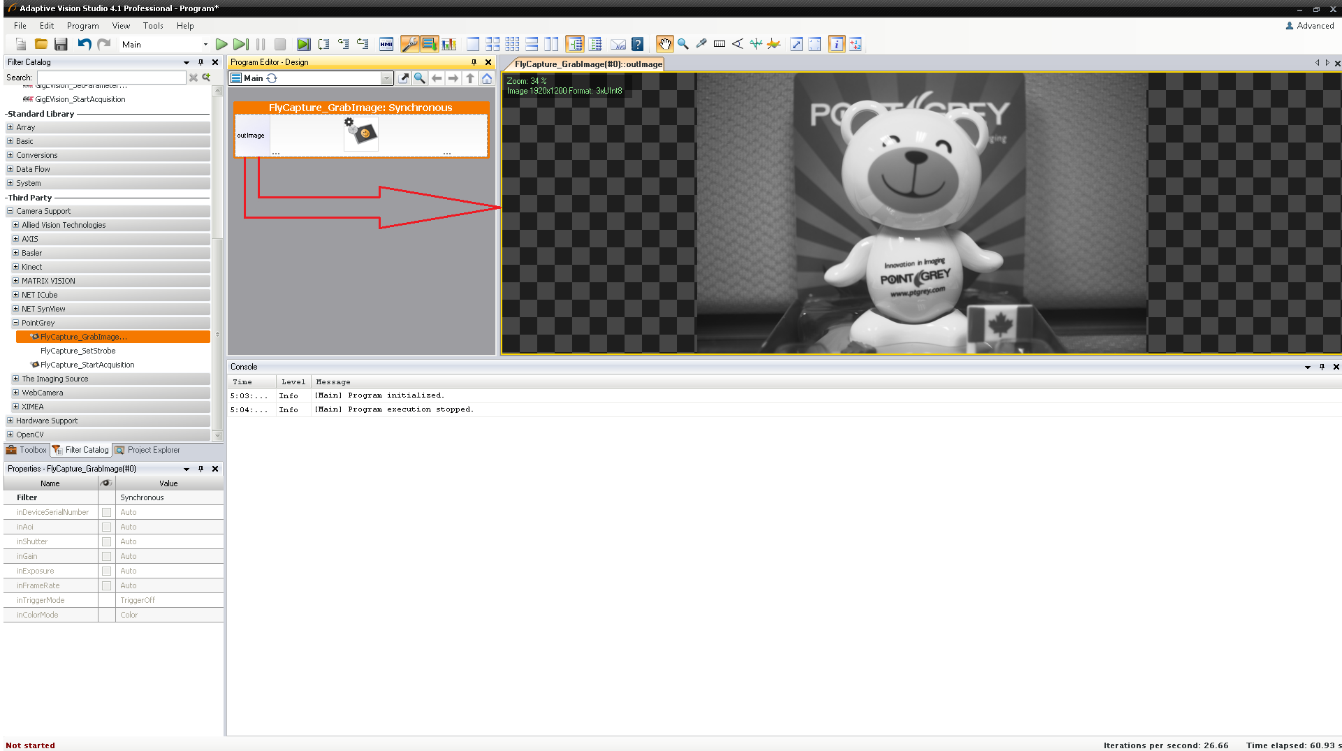
To start acquisition with a FireWire, USB2 and USB3 camera
- In the Program Editor, drag the outImage box to the window on the right side of the screen.
- Press F5 to start acquisition using the PointGrey filter.
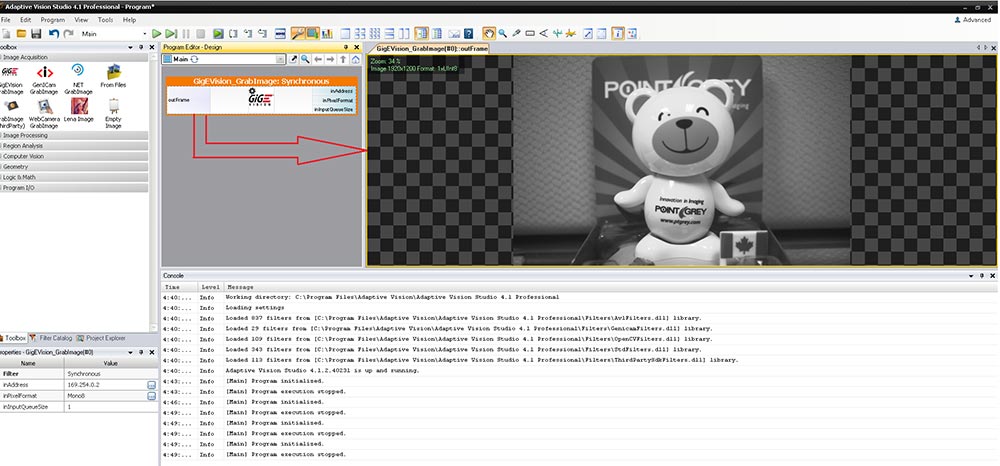
To start acquisition with a GigE Vision camera
- In the Adaptive Vision program editor, drag the outFrame box to the window on the right side of the screen.
- Press F5 to start acquisition using the GigE Vision_Grabimage filter.
Troubleshooting Tips
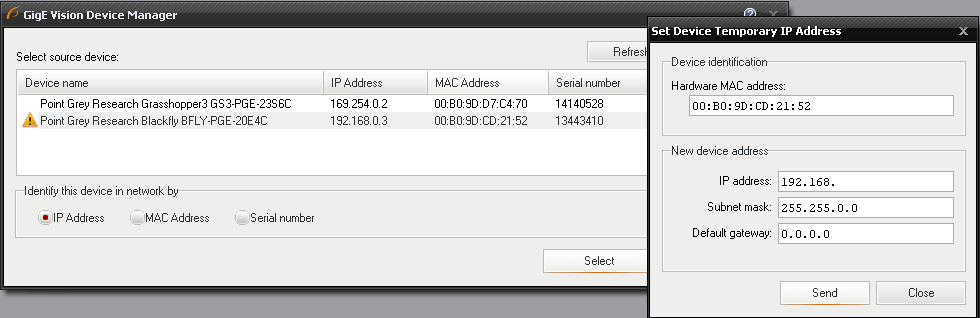
What if my GigE Vision camera is not reachable?
If a yellow triangle appears beside your camera, it means that the camera is not reachable. Assign a valid IP address to the camera to correct that.
To assign a temporary address to the camera:
- Right-click on the selected camera and select Assign Temporary IP for Unreachable Device.
- Type in a new IP address and click Send.
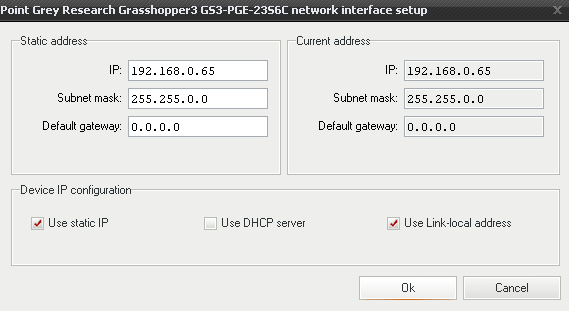
To assign a permanent/static IP address to the camera:
- Right-click on the selected camera.
- Select Setup Device Network Interface.
- Type in a static address and click Use static IP.
- Click OK.
Additional Troubleshooting Suggestions
The following tips may solve other problems:
1. Update the driver to the latest version.
2. Update the firmware to the latest version.
3. Update the software to the latest version.
4. Perform a soft reboot and if still necessary a hard reboot of the PC.
5. Disable then enable the driver.
6. Power cycle the camera.
7. Power the camera through GPIO, if wiring harness is available.
8. Use a separate host controller instead of an integrated one, if available.
9. Ensure the card is powered via the 4-pin hard drive connector, if applicable.
10. Use a different cable or host controller or PC.
Related Articles
-
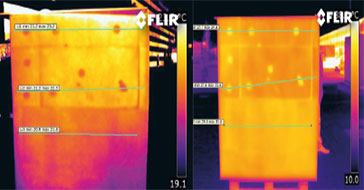 Application Story
FLIR cameras support analysis and diagnosis of external thermal insulation systems
Read the Story -
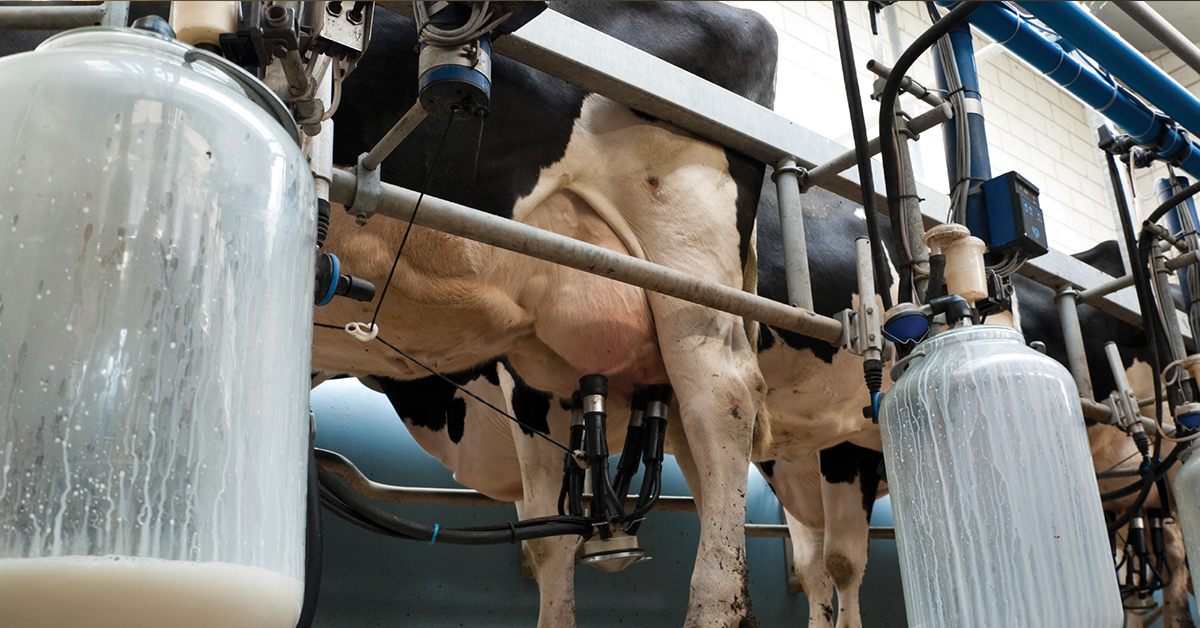 Case Study
Automatic Health Check in Dairy Farms Using FLIR Thermal Imaging Cameras
Read the Story -
 Deep Learning
Comparing Deep Learning Cameras with Smart Cameras
Read the Story